How To Replace The Main Wire
Published on 3rd March 2026
AI Breakdown
Replacing a damaged power cable is one of the most basic but essential maintenance tasks on any coffee machine. A worn or loose cable is not just an inconvenience—it can become a safety hazard. Fortunately, the procedure is straightforward if you approach it carefully and methodically.
Removing the Old Cable
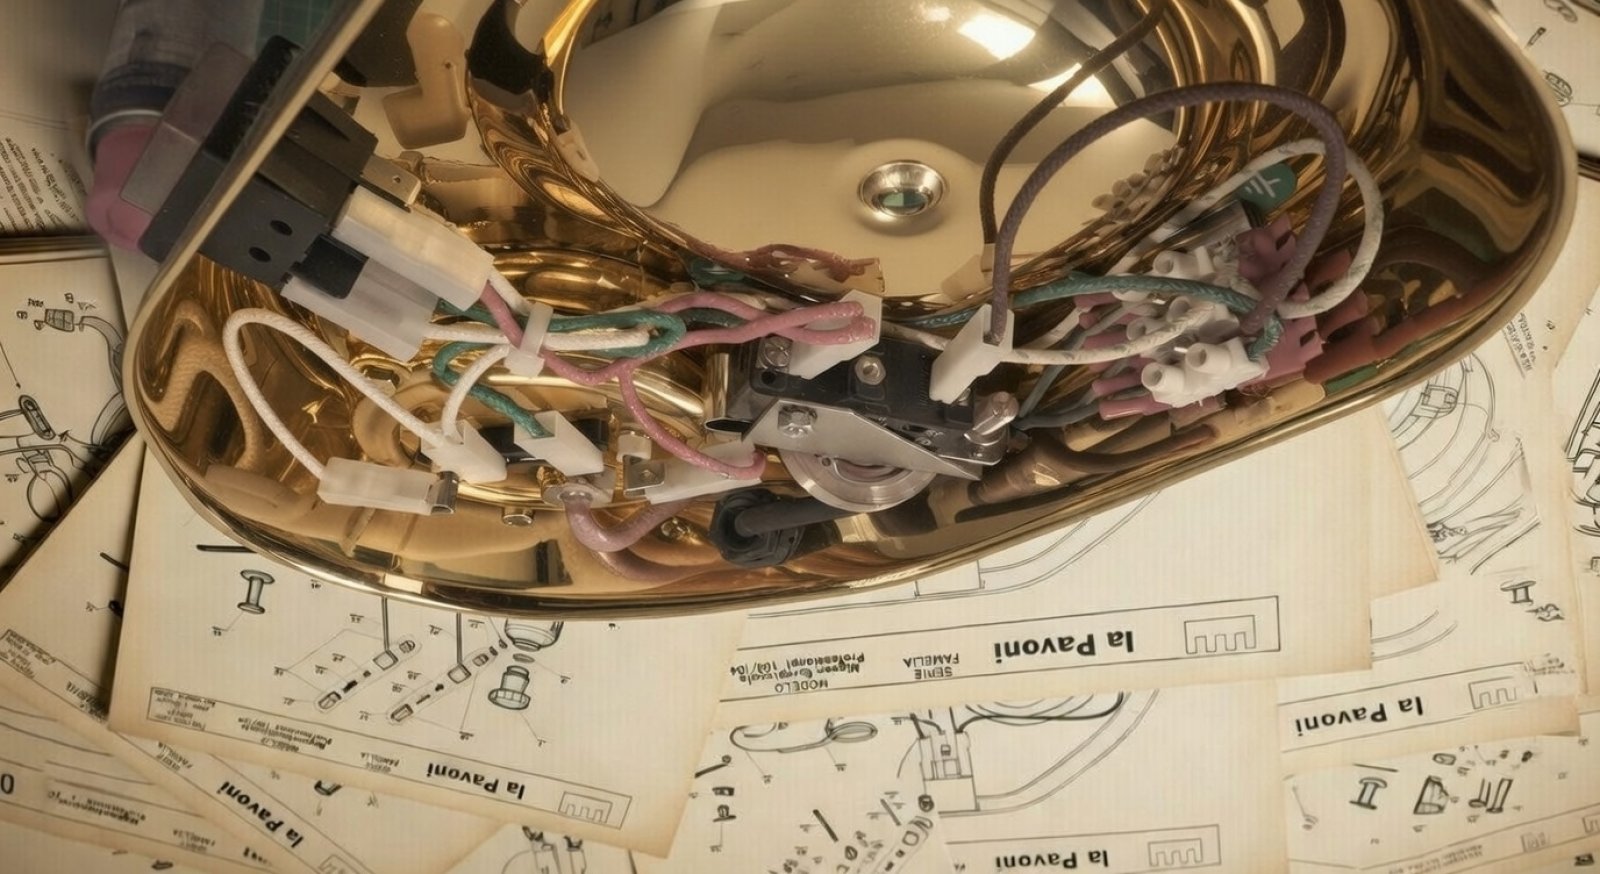
The first step is to remove the remaining section of the original cable from the machine. Begin by loosening the electrical terminals that secure the internal wires. Once the terminals are released, the wires can be pulled free from the machine.
With the wires disconnected, the cable itself can be removed by loosening the cable gland. Some machines use a gland that resembles a nut but does not actually unscrew. Instead, it has an open and closed locking position. When the gland is opened, the cable can simply be pulled out.
Avoid forcing the gland. These components are typically plastic, and excessive force can easily break them.
Preparing the New Cable
The outer sleeve of the replacement cable should be removed to roughly the same length as the original. The exact measurement is not critical, but there must be enough exposed wire to comfortably work with the internal conductors.
A useful technique when cutting the outer insulation is to bend the cable slightly before making the incision. The tension created in the rubber allows the outer sleeve to split with only a shallow cut, reducing the risk of damaging the inner wires.
Once the outer sleeve is removed, strip the insulation from each individual wire.
Improving the Wire Terminations
Many original cables use crimped terminals to keep the copper strands tightly bundled. When crimps are unavailable, a small amount of solder can be applied to the wire tips to hold the strands together.
Lightly tinning the ends of the wires transforms the bundle of copper strands into a solid tip that behaves almost like a single conductor. This can improve the grip inside screw terminals and reduce the risk of loose strands or poor electrical contact.
This step is optional. Properly twisted wires tightened securely in the terminal will generally work perfectly well.
Installing the Cable
Feed the wires through the cable gland and position them in their respective terminals. Tighten each terminal firmly so the wires are held securely.
Loose connections can become looser over time due to vibration and heat cycles, potentially causing disconnection or electrical arcing.
Pay careful attention to the routing of the cable inside the machine. The wires should never come into contact with hot components such as the boiler or heating elements.
Securing the Cable
Once the wiring is complete, tighten the cable gland to clamp the cable in place. The gland’s purpose is to prevent movement and strain on the internal connections.
Because the gland is plastic and functions more like a clamp than a traditional threaded nut, it should only be tightened enough to secure the cable without forcing it.
Final Check
After installation, confirm that the cable is firmly held, the terminals are tight, and the wiring is clear of any heat sources. A properly installed power cable should remain stable and safe for years of operation.